Wednesday, December 31, 2008

Happy Old Year!

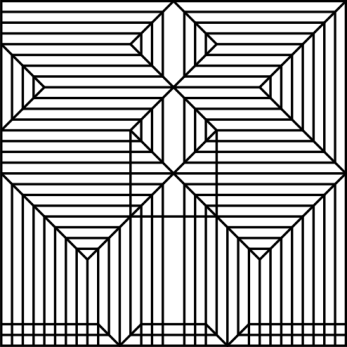
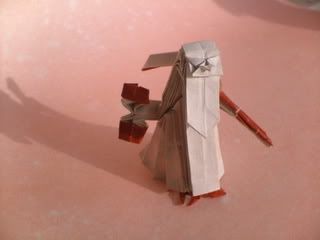
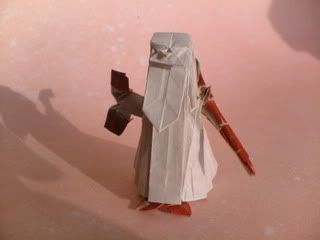
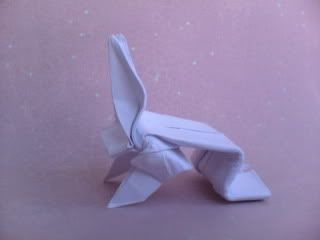
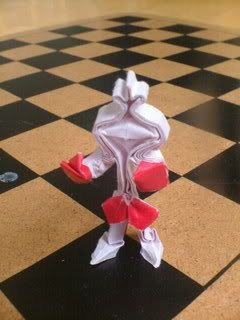
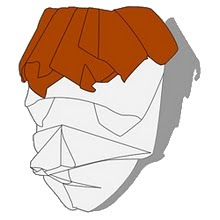
Well, another year has gone by and plenty has happened. In previous years, I've seen the years represented by an old man (the past year) and a baby (the new year). That old man is father time, who carries his scythe and hourglass everywhere he goes. For the new year, I decided to fold father time, which proved a bit difficult. I took a few CPs, all boxpleated, to come up with this: Father Time CP On the left is the hourglass, and the right is the scythe. The face is easy enough to fold, with two inside reverse folds after folding the middle triangle. The hour glass just needs to be spread on either end, and the ends folded over to make color changes. The scythe was my least favorite part of the model, because every time I folded it, the paper ripped. I guess that you need larger paper to make it correctly. Note that the feet are the same as the ones on HOJYO Takashi's Archangel Gabriel. Father Time, Ryan MacDonell Father Time, Ryan MacDonell Oh, and I have a slightly different look to my blog, in case you didn't notice yet.

Friday, December 26, 2008

A Green Christmas

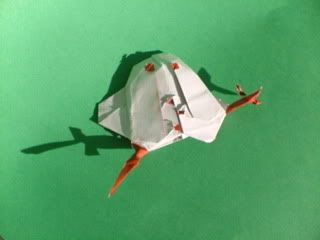
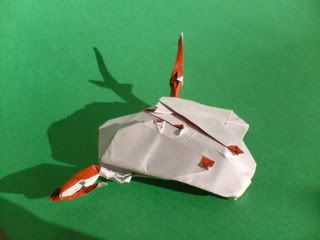
Sadly, due to the unpredictable weather out here, we ended up with a white Christmas eve, and a green Christmas. I can't actually remember the last time that I had a white Christmas (probably two years ago...), but green in just fine with me. I wanted to fold a snowman recently, seeing as I couldn't come up with something with a Christmas theme. However, I soon found that snowmen with good color changes are actually quite hard to fold. I gave up on the idea, and figured that I probably wouldn't get to fold anything for the theme. Then yesterday, the rain caused most of the snow to disappear, and I had the idea of a melted snowman. I don't have a CP for it, because its easy enough just to explain. I folded a waterbomb base first, and folded the front to flaps up to the top so that I could pull up a layer to make the top button. then I pleated the flaps so that two more button could be made, and made the end of the flaps to make eyes. I squashed the back flaps and did a petal fold so that I had two thinner flaps. I then pulled the out enough ot be arms, color changed them and added details so that they look like sticks. Finally, I folded the body semi-randomly to make the puddle/melted shape. Here is what I ended up with. Happy Holidays!
Melted Snowman, Ryan MacDonell

Saturday, December 20, 2008

Action Time

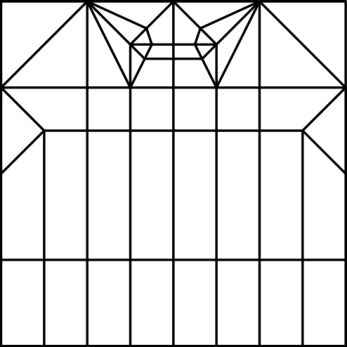
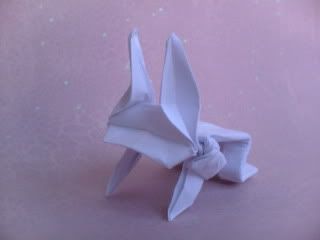
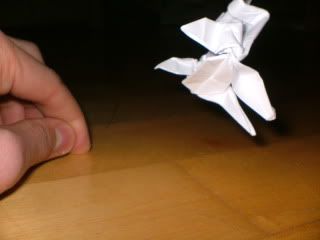
I can't remember whether I've ever managed to design a action model before (not counting the jumping frog with mouth), but I did this time. The theme this month on the english origami forum is Holidays, so I decided against doing what most of the other people were doing, which is Christmas themed models. I went with a random holiday, Easter, and tried to think of what represented it best. Of course, it was a rabbit. It is quite a simple model, and the jumping system is made the same way as the traditional jumping frog. Here is the CP that I used: Hopping Rabbit CP It is quite a simple CP, and there is are a few more details that need to be added. The front legs need to be folded inwards and thinned, and the back section has to be thinned. with a bit of details of the ear and some rearranging of the head, you should end up with something like this: Hopping Rabit, Ryan MacDonell Hopping Rabit, Ryan MacDonell And, of course, no action model would be complete without an action shot: Hopping Rabit, Ryan MacDonell

More Biologically Accurate

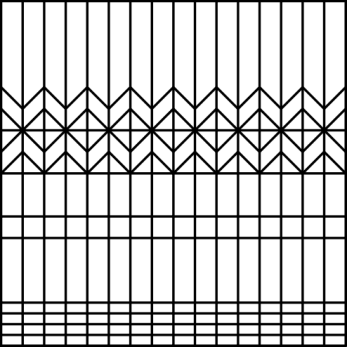
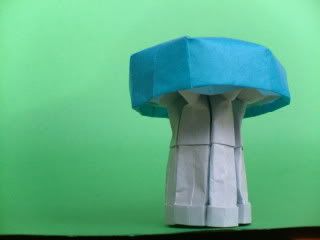
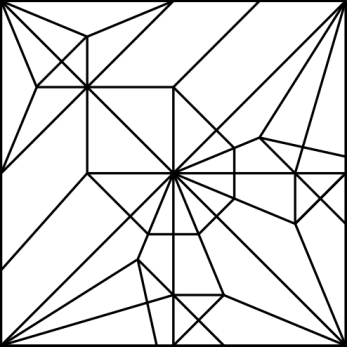
For some reason, I've been thinking about mushrooms lately. I wanted to fold one different for the others that I've seen folded before, with some more things that mushrooms usually have. Using what I learned in biology last year, I made a mushroom with gills underneath the cap, and with a simple stipe, annulus and volva. As with most round models with flaps, I had to use pleating. This is the CP that I ended up with:
Mushroom CP

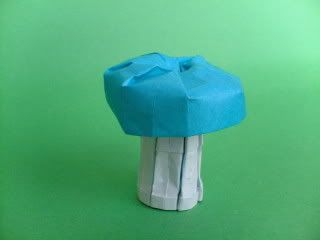
After precreasing everything, simply overlap 1/8th of the side edges and fold. The gills should face downwards, so that they can be seen once the top us unwrapped to make the cap (which doesn't like to stay together...). Here is what you should end up with, or close to:
Mushroom, Ryan MacDonell

Saturday, December 13, 2008

Tiger/Zebra

The challenge this month is "In Black and White" on the french origami forum. Strangely enough, the only thing that I could think of to fold in black in white was a zebra. I had no idea how I was to fold one, especially because of all of the stripes on it.
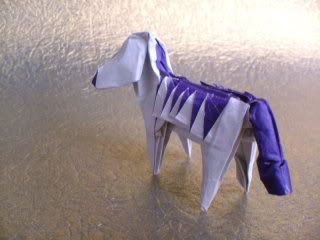
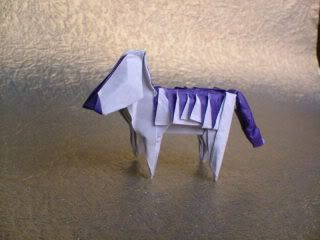
Luckily for me, I remembered about Hideo Komatsu's tiger and the nice stripes. I didn't want to use his method at first, but I eventually decided to use it. To fold this model, follow steps 1-103 of his tiger to achieve the stripes. Then, make the head and tail using the lines folded in steps 11-12. For the details, color change the tail by wrapping the flaps around, and make a color change for the nose after folding a head. Thin the legs and the body, and you should end up with something like this:
Zebra, Ryan MacDonell

Monday, December 8, 2008

Hummingbird

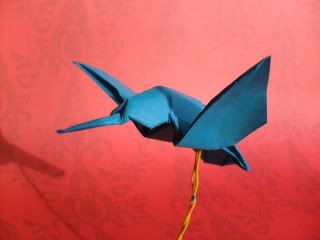
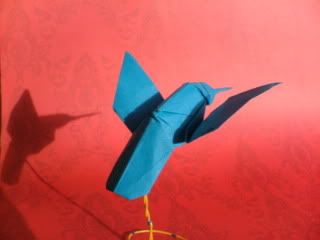
Yesterday I managed to finally fold something, by doodling of course. I hope to think of something for either challenge this month, but I haven't got to it yet. I ended up with a hummingbird, which is an interesting design at this time of year. Here, they would just freeze and drop onto the snow-covered ground. Here is the CP that I used, which is actually quite simple: Hummingbird CP The wings end up below the tail, and need to be folded forward and up. A little opening of the tail will make it more suited for a hummingbird, and the head simply needs to be thinned at the end to make the beak. Good luck! Hummingbird, Ryan MacDonell Hummingbird, Ryan MacDonell

Sunday, November 30, 2008

Half of What I've Been Doing Lately

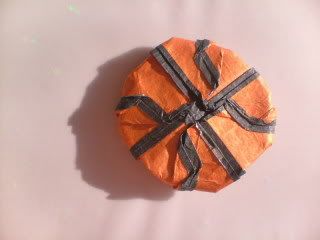
I've wanted to fold a basketball for a while now, but I wasn't quite sure how to do it. I finally used the windmill base with all of the corners squashed, which leaves me with just the right number of color-changeable lines. There is no real point to having a CP, because the base is just too simple (and I just explained how to make it). After folding the base, four lines have to become the horizontal and vertical lines, while the other four become the "curved" lines. Then the sides and corners just have to be folded in, and you have a basketball. I suggest using orange and black colors, but you can use whatever you want to. Basketball, Ryan MacDonell

Sunday, November 23, 2008

Pokémon

This month, the challenge on the english origami forum is Video Games. Seeing as I can't remember playing many video games in the past, I decided to try folding a Pokémon. I didn't even know that Pokémon still existed until I saw some recent models on flickr of what people claim are some, but didn't look like anything that I remember. The only Pokémon that I remember were the original red and blue versions. Actually, come to think of it, I remember some more but those first two were the only ones that I ever played. I lost interest before emerald, sapphire, ruby, etc. came out. I guess that I just figured that it couldn't still be going, but I was wrong. I don't have a CP for this model, mainly because the base is so simple.
To make the Kakuna (which I've always found strange, as it is the cocoon between a caterpillar and bee stage) , just make half a windmill base using the two two corners. It should end up looking somewhat like a house. The top corners become eyes, and the rest of the model is just details such as all of the pleating on the body. Try to make it look something like these pictures:
Kakuna, Ryan MacDonell

Tuesday, November 11, 2008

Lest We Forget

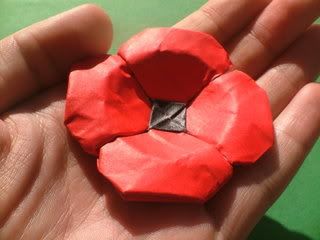
November 11th in Canada is Remembrance Day, the day that we remember all of the soldiers who went to war for our country. Every Remembrance Day, we wear a poppy. I felt that this year I should try to make a poppy such as the ones we wear, so last night I started folding. I used a Kawasaki twist to make the black center, and then folded the sides in beneath the twist to make the red petals. I then made it into a octagon shape and added curves. Here is the CP:
Poppy CP

The square twist has to be done first, and I suggest precreasing the folds into the center before actually finishing them, because one of the corners has to be tucked inside so that each part overlaps another part, and the center shows through correctly. The corners can be folded in with an inside reverse fold, and then just fold curved pleats from the center and lock them.
Poppy, Ryan MacDonell

Wednesday, November 5, 2008

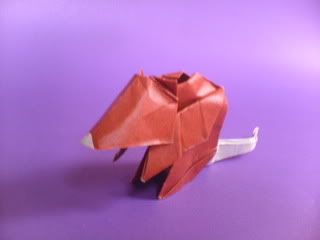
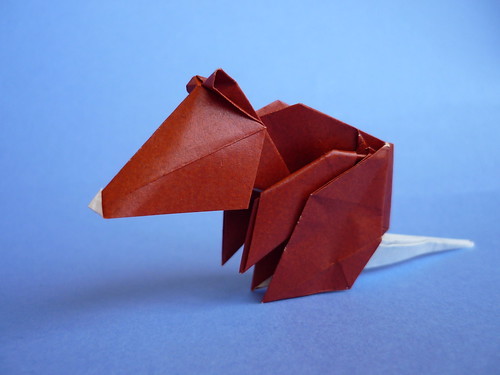
And Another Rat, too

It seems that I like to repeat subjects, but not the way that I fold those subjects. I end up with the same things over and over, but they are never done the same way.
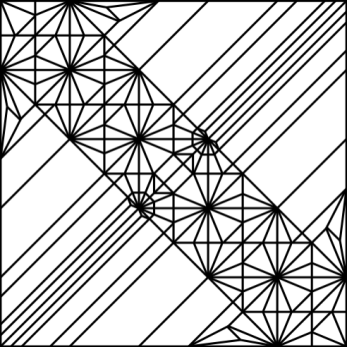
I had decided to try using the Maekawa 22.5 degree angle arrangement (as I like to call it), like what I used on my Moth. This time, I wanted to base it on the diagonal. Also, I decided to make two squares using boxpleating. At first, I made a cat out of the base, but yesterday in class I tried folding it twice more, and the second time I ended up with a rat instead. When I folded it out of two-colored paper, i found that there could be a color changed tail. Here is the CP:
Rat 2 CP

The CP doesn't really get you very far, but it shouldn't be too hard to figure out. The head is probably the hardest to make, and after that the back is pretty strange without the right shaping. Folding the point of the body up to the halfway point the right way to go. Hopefully it isn't too strange. I hope to make diagrams, anyways.
Rat 2 CP, Ryan MacDonell

And heres a refolded version:
Rat 2, Ryan MacDonell

Saturday, November 1, 2008

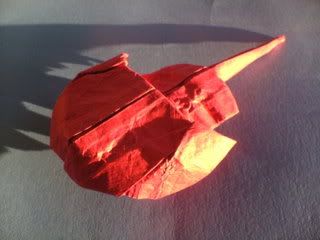
Back to the Horseshoe Crab

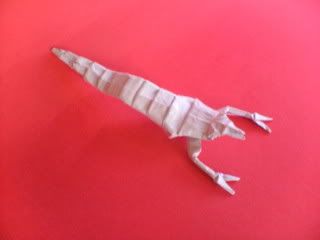
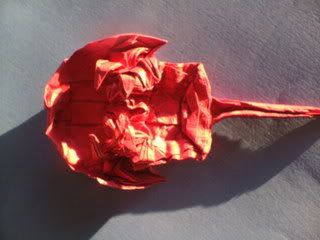
I didn't get to fold many things last month, as I had a pile of things to do. Hopefully I'll be able to get more done, especially seeing as I have a project on the mathematics of origami coming up. I finally decided to go back to the old horseshoe crab, because I never did give it any legs like I said that I would. I started out basing my model diagonally on thirds, but that didn't give me enough legs. Then I tried fifths with the same idea, and ended up with nice model that has all ten legs. There are a lot of details left out of the CP. Horseshoe Crab 2 CP This crease pattern just shows how to make a base with all of the legs, but no distinct head of tail. Either end can make either, and they aren't hard to make. The head has to be shortened up and pleated so that the points on either side can be formed. The abdomen and telson has to be thinner, and the telson (tail) can just be made one third the size of the abdomen. A mouth can also be made with the paper between the legs, by folding four 45 degree angle folds. Horseshoe Crab, Ryan MacDonell Horseshoe Crab, Ryan MacDonell

Saturday, October 25, 2008

Mike Wazowski!

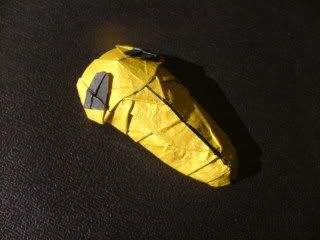
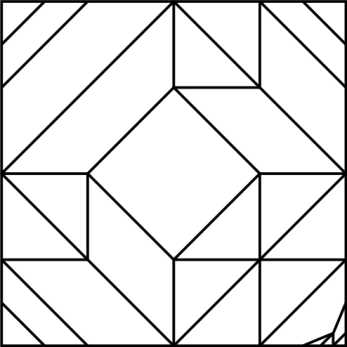
This month on la forum francaphone (which just got a new look, and an new name), the challenge is Film Characters (rough translation). I couldn't think of what to fold this time, and I started off with Lumiere from Disney's Beauty and the Beast. That didn't work out at all, so I tried Mike Wazowski, the short green monster from Monsters Inc. My first ideas didn't work out, and eventually I just stopped with the model that I have now. It doesn't look like Mike, maybe it was him as a child. Here is the CP, based on a blintz fold and windmill base.
Mike Wazowski CP

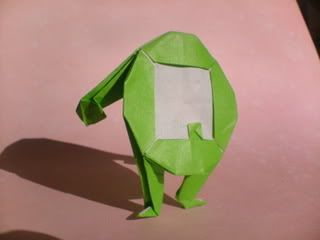
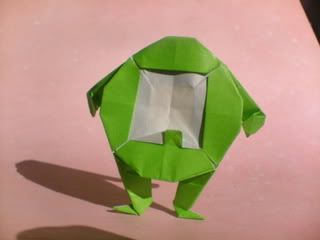
The top and left edges are the arms, and the bottom and right ones are legs. All of the corners fold behind to make the color changed eye, except for the bottom right hand corner which makes the iris/pupil. As you can see from the pictures below, its not quite Mike, but I like it nonetheless.
Mike Wazowski, Ryan MacDonell

Thursday, October 16, 2008

More Mythology: Now With a K

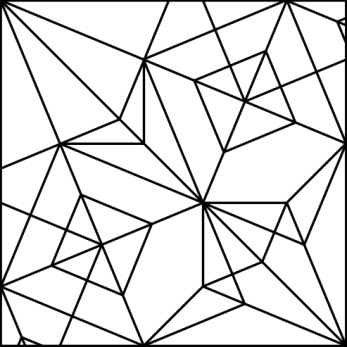
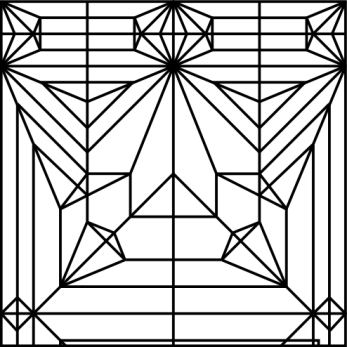
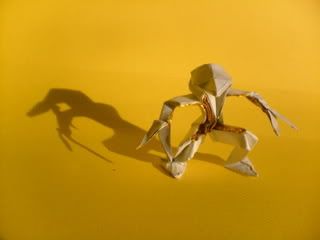
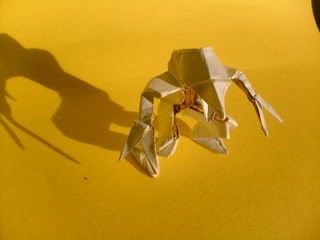
After reading about the Amikiri on a link, I couldn't help but make some proportional changes and such on the CP to add legs and a shorter body to form a Kamikiri. I started off by changing the top portion that makes the claws and beak from and eighth to three sixteenths. I then made simple legs with the bottom corners, and I had myself a kamikiri. There isn't much more to describe it, so here is the CP:
Kamikiri CP

You can tell how the claws are similar to the previous model, and how the legs were made. The two 22.5 degree angle squashes near to the bottom corners are necessary, because otherwise the outside flaps run into that part of the legs. I shouldn't be too hard to make, and the part where the arms connect should be the hardest part,the same as in the Amikiri. Good luck!
Kamikiri, Ryan MacDonell

Tuesday, October 7, 2008

A Little Bit of Mythology

For this month on the origami forum (the english one), the challenge is Mythology. There is, as mentioned, very little difference between "fantasy" and "mythology". However, I still think there is a good challenge behind it, because fantasy can simply be made up recently, where mythology is something from stories from long ago. You have to find a mythological creature, but can make up one of fantasy.
Anyway, enough about the differences. Here is the CP that I used. Note the "trianglepleating" used to make the thin arms.
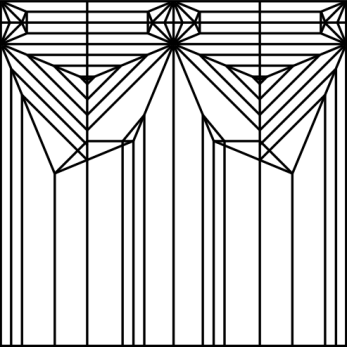
Amikiri CP

So what does it fold? I forgot to mention. While looking through Wikipedia's list of creatures from mythology, I found something called an "Amikiri", from Japanese mythology. It has a long plated body, a bird-like head and lobster-like claws. Its also known as a net cutter.
If you fold the CP right, you should end up with a base with the beak, arms with claws, and body. Then, with a little detail, you should end up with something like this:
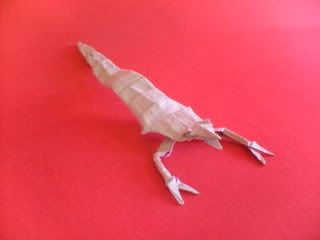
Amikiri, Ryan MacDonell

Sunday, September 28, 2008

Chess Boxing?

Why not? It turns out that chess boxing has been going on since 2003, and is gaining in popularity. I can't help but wondering whether it would be hard to think of your chess moves after being hit in the head a few times... I decided to go with a somewhat random sport for this months challenge of sports on the english origami forum. Seeing as I hadn't participated in the sports challenge on the french forum, I had a second chance. He is my boxpleated CP, with a 16:16 grid.
Chess Boxing CP

It is mostly a simple human form, with some extras. The square in the head forms the cross on the king's head. The bottom point in the center becomes the color changed shorts, and the gloves can be formed by wrapping a layer around the end of the arms. Then only the head remains to be shaped.
Chess Boxing, Ryan MacDonell

Tuesday, September 23, 2008

Tessellation Application?

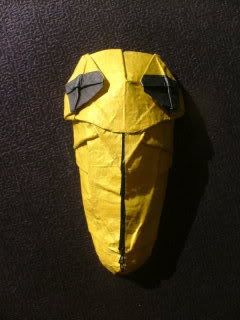
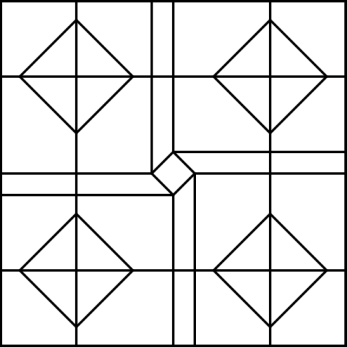
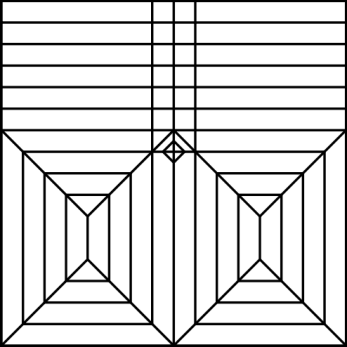
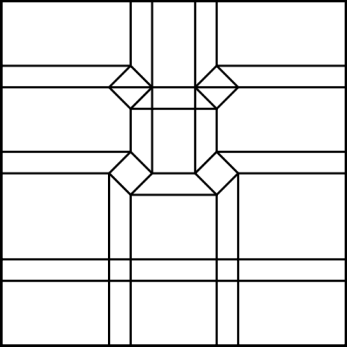
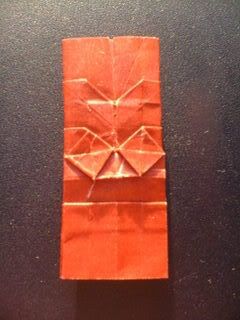
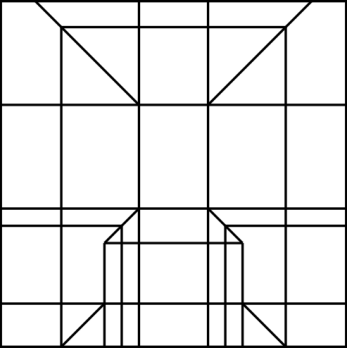
Not too long ago, I was exploring an application for tessellations in representational origami. I intended on using a triangle grid, but I guess that I could call this a start. For some reason, I decided to fold some square twists side by side, and found that if you folded in between two of them, it looked a lot like eyes. At first, I had the idea of making a fish out of this, but found that there simply wasn't enough paper with the grid I was using (maybe I'll make a fish some other time...). I also noticed that the part beneath the eyes looked a lot like a triangular nose, so I added a mouth and eyebrows. I ended up with a Tiki Mask, a wooden mask from Central Eastern Polynesian islands in the Pacific. Here is my CP:
Tiki Mask CP

I didn't include a grid, but it shouldn't be too hard to guess. All vertical and horizontal lines are on a 16:16 grid. After you fold the base, all you need to do is fold in the sides however you feel like folding them. Enjoy!
Tiki Mask, Ryan MacDonell

Monday, September 22, 2008

Something Simple

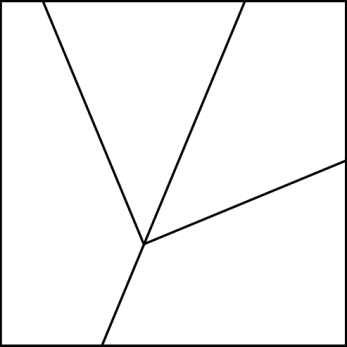
Lately, I've had a (only somewhat nasty) cold, and I can't really say that I've enjoyed it so far. However, when blowing my nose, I noticed that one time I folded it in a 22.5° angle. If that wasn't strange enough, I decided to just look at a kleenex (not used) that was folded in the same way. I then played around with it a bit and ended up with something that looked like a bear, made from only two folds. Its strange what can inspire you sometimes.
However, when I got home, I found that the bear really didn't look right because of the head color change, which I just couldn't avoid. So I considered what else it could be, until I ended up with two simple 22.5° angles making a man with a bouquet. The idea of making something this way came from Paula Versnick's bi-fold Santa. Here is my CP:
Man with Bouquet CP

Not too hard, eh? And theres no shaping involved either! I shouldn't be too hard to figure out which way to fold it, just do the straight 22.5° first. If the color changes don't look right, just switch around the mountain/valley folds until you get it.
Man with Bouquet, Ryan MacDonell

Thursday, September 18, 2008

Rabbit on the Moon?

Sorry for the "long" break there. It turns out that grade 11 teachers really enjoy the idea of homework...
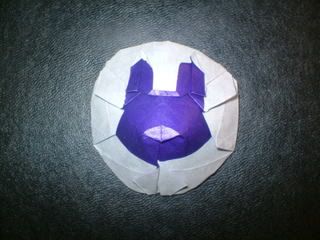
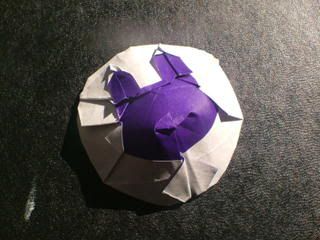
I actually never though about the different things that you can see when you look at the moon, until I was staring at blankly at the french forum challenge topic at the start of this month. It turns out that this month is "Le Lapin de la Lune", which means (roughly) "Moon Rabbit". I soon found out that, in quite a few regions, people used to look up at the moon and see a rabbit (rather than "the man on the moon" often seen today). I couldn't really figure out what I should make to represent it. Eventually, I decided on using color changes to represent the rabbit. Here was my result:
Moon Rabbit, Ryan MacDonell

The model is completely based around the ears. The rest of the model us simply pleats and folds, with another pleat to make it round. The pleat forms the rabbits cheeks, and you can then use the end of it to make a nose.

Sunday, September 7, 2008

Some Call it Sweet

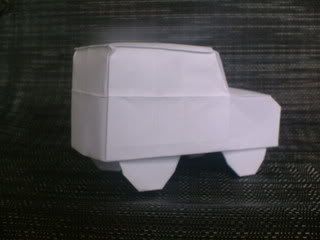
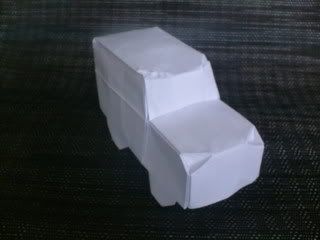
I decided to try my hand at an origami car, based on Robert Lang's and Joseph Wu's recent cars. I started folding, and it turned into an SUV instead. In fact, it looked an awful lot like a Honda Element, an ugly small-ish SUV that looks like a box on wheels. So that ended up as my name for the model. The CP is fairly simple, and even uses the same method as the podium to make the front and windshield. Honda Element CP As you can see, the model is made using simple pleats and locks. However, I didn't include some creases such as the wheels, which I made using 22.5° folds, as well as the doors and windows, which are simply creases. Honda Element, Ryan MacDonell Honda Element, Ryan MacDonell
Thursday, August 28, 2008

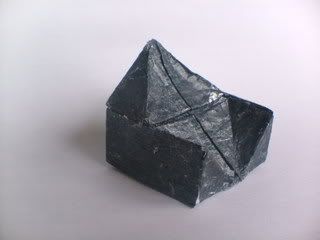
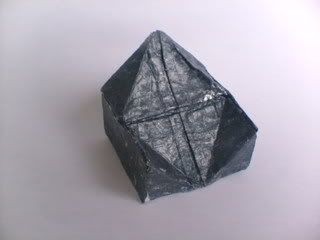
K-Dron: Finally Finished

After weeks of making the shape called a K-Dron, I finally managed to fold one myself. I make the shape again and again out of paper, finding out more and more ways to reduce the cutting and increase the folds. Eventually, I made a model that required only one small cut, which I knew that I could easily fix. However, there was ans still is a major problem with this model, one that I don't really know how to fix. No matter what you fold it with (unless you use sheets of thick metal, perhaps), it ends up not being able to stay closed on its own. This problem can be fixed in a non-purist way by using glue or tape, but I still would rather it done by folding alone. I didn't bother making a CP because of this.
To make the model, I first planned on how it would be done by making the faces connected to the correct places. Then I simply found a way to fold the basic outline from a rectangle, and added pleats to make slits so that no small cuts would be required. Here is a picture of my K-Dron:
K-Dron, Ryan MacDonell
I'm now planning on showing the shape to Tomohiro TACHI, because I am pretty sure that this model is possible using his origamizer program.