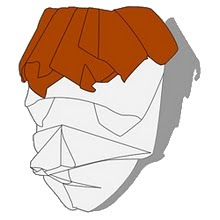
Monday, April 13, 2015

Finally finished again

I haven't been able to design anything in a long time, in part due to "folder's block" as well as having recently spent a summer traveling.

Seven years ago, I attempted to fold a geometric shaped known as a k-dron. Although I didn't mention it in that blog post, much of the "design" work was just free folding to get a final shape that looked right. It's safe to say that I wasn't really satisfied with the end product but I posted it online anyway (as I often did then).

Last week, I found out about the Weaire-Phelan structure which is (at the moment) the most efficient known unit for closed packing of 3D space (in terms of surface area to volume). I soon started trying to figure out it's structure and symmetry. After a while I thought about how it might be folded, considering it has both concave and convex parts. This lead me back to the k-dron, which has a single convex point.

My k-dron work this time consisted of me working with accurate angles and proportions on Inkscape. After a couple trials, I figured noticed the following: To use paper efficiently, if two sides of a face don't match up I at least need to have the vertices matching, which may mean "cutting" a face and pleating it together. This is a bit clearer from the following image.


The above image shows how I decided to split the central face of the model in order to match the vertices with the sides. I also split the five-sided face so that I could match edges. I first drew the layout for a 14x14 grid, then added a unit all around to be folded inside and lock the model. Keeping the bottom triangles at a 90 degree angle with the sides, I noticed several different references for the model, shown as black lines. Most are just extensions of folds matching with a grid line. The most important are the references circled in red. Two points on the grid lead to a very good approximation of the angle. From those lines all the rest of the difficult angles can be folded. Based on those references, I drew this CP:


The model didn't really satisfy me without a bottom face, so I decided to make a base to fit it.


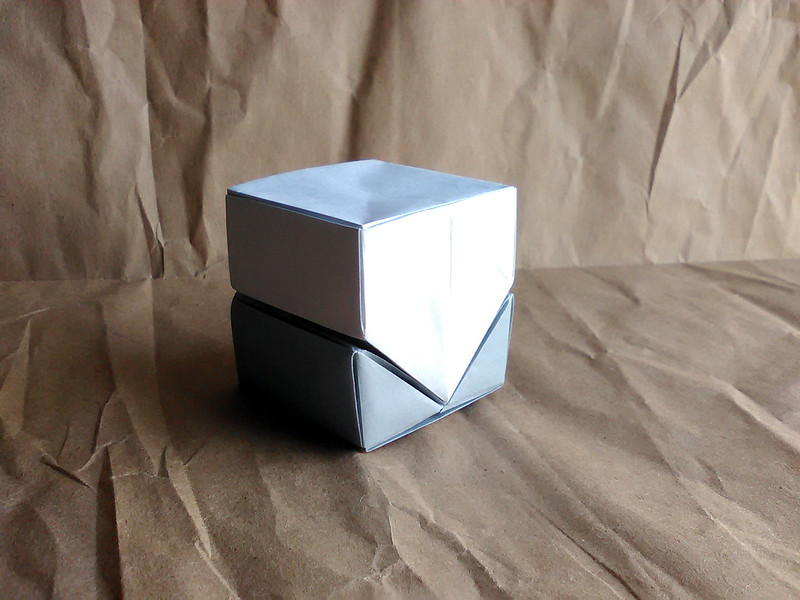
The two parts fit together similar to a masu box. I know that I could achieve a similar result by using a longer rectangle but the base gives some added support to the model. The result is quite nice, with only two seams showing on the full surface area. The real magic comes from making two units, which fit together to make a cube without gaps.
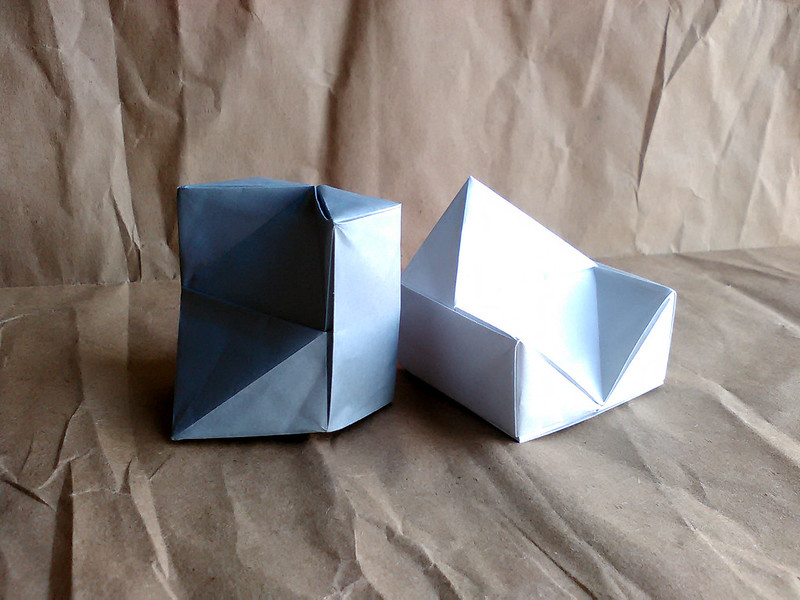
K-dron, Ryan MacDonell

K-dron, Ryan MacDonell

I realized afterwards that, like the Weaire-Phelan structure that started my thoughts about geometry, the k-dron will also span 3D space because two of them make a cube. I'm glad that inspiration managed it break it's way through the "folder's block," and with any luck it might persist. I've had a lot of ideas in the past year so it's only a matter of deciding how to fold them.

Monday, January 13, 2014

12 Days of Christmas: Hours of Folding

This took me a little while to post due to a lot of sudden events over the past week. I've seen at least one project in the past where a folder (namely Andrew Hudson with "Octagons for October") designed a new model every day for a certain amount of time (I believe Andrew did a full month). I decided to take up a similar project myself, except with only 12 holiday themed models for the 12 days of Christmas. I decided soon after I started that it would be best if I posted all of the designs on a single blog post instead of writing a short post every day.

On the first day of Christmas (i.e. Christmas Day) I already had a minimal colour change model in mind. The model is named "Stocking on Red", and as the name suggests it is meant to show only the white heel, tow and cuff of a Christmas stocking. The model is made from an offset windmill base (both in angle and centre).

Stocking on Red, Ryan MacDonell

The next model was some berries leaves of holly. To be honest, I don't think I've ever encountered real holly, just plastic Christmas decorations. The model is from a waterbomb base, with 3 corners for leaves and a corner for the berries.

Holly, Ryan MacDonell

Day 3 brought an idea that's been done before by other folders, but I decided to try something of my own. The idea is to fold a wrapped gift box with a bow. For paper efficiency, I only made a 3-sided box; however, as long as the shadow doesn't give it away it seems like a full box. The size and shape can be varied too, as shown in the photo.


Wrapped Gift, Ryan MacDonell

The fourth day was another simple colour change model. I figured out the night before that I could fold a simple manger from a pig base, so I just folded is some more paper to make a colour changed baby.

Baby in Manger, Ryan MacDonell

The fifth model is probably my favourite, and it seemed to be pretty popular as well. Despite the fact that we celebrate Thanksgiving, turkey is still a very popular food at Christmas. I remembered seeing Joseph Wu's roast chicken, so with that in mind I folded a roast turkey from a waterbomb base. The model is completely closed, and the folding sequence is simple enough that I'll probably make some diagrams.

Turkey, Ryan MacDonell

After the turkey, I was running a bit short on ideas that were quick to design and fold. I remembered seeing a few traditional models made 3D (such as in one of the Tanteidan magazines), so with that in mind I designed a sleigh. The result is probably my least favourite design from the series, but I feel like the idea could be used to make something much better looking.

Sleigh, Ryan MacDonell

Day 7 was new years eve, so I thought it would be appropriate to fold something that represented 2013. A few things came to mind, but I ended up folding Canada's news maker of the year: Toronto's crack cocaine smoking mayor, Rob Ford. The model is based around using the diagonal for the colour change tie.

Mayor Ford, Ryan MacDonell

The eighth day of Christmas was New Years day, so naturally I folded my interpretation of fireworks. The model is based on the simple idea of using raw edges for colour change. It should be possible to fold the model from the photo. Note that the centre of the burst is at the centre of the paper.

Fireworks, Ryan MacDonell

My ninth model was another rushed idea to get it done in a day. I've been thinking of ideas for a Santa model for over a year now. My idea was to have the beard come from the centre of the paper, and I ended up with a star shape. As a result, I called it "Santa Star". Without the hat, the shape also reminds me of the abominable snowman from Monsters Inc.


Santa Star, Ryan MacDonell

The model for the tenth day has to be one of my favourites, right after the turkey. In 2010, Vancouver hosted the winter Olympics and HBC sold red mittens with a white maple leaf on the palm. The mittens were extremely popular, and for a while even on the opposite side of the country you couldn't go anywhere without seeing them. The model is from half of a windmill base.

Olympic Mitten, Ryan MacDonell

On day 11 I folded a model that I'd been thinking of since the beginning of the series: a camel. In particular, it is a dromedary camel (one hump). I wasn't aware before looking at reference images how oddly shaped camels are. I'm happy with the result, but I realized that a 15 cm square is a bit too small for this model.


Dromedary Camel, Ryan MacDonell

The final model was done quickly, but it ended up being another of my favourite models from this project. I wanted to fold another Christmas tree, this time with colour change from the centre. The model is based off of a windmill base (like most colour change models of this type) with some extra paper from around the edge. The CP is particularly interesting, so I hope to see some other people try it out!


Christmas Tree 2, Ryan MacDonell

All in all, I'm very happy with how the project turned out. Even with the rushed models, having a deadline for designing helped me to come up with new ideas and think of interesting subjects each day. I might not do another project like this for a while, but this has certainly inspired me to spend a bit more time playing with design ideas.

Tuesday, September 3, 2013

Just a Snake

Seeing as antlers are thin and have several points, they aren't an easy addition to any origami model. Naturally, this lead to the challenge of adding antlers to anything and everything possible. I had yet to fold a snake for the year of the snake, so once I was back from the convention it didn't take my long to come up with this crease pattern:


My goal with this design was to efficiently make simple colour changed antlers from the corners of the paper. There is a lot of extra paper on the body, so I made colour change spots with a 22.5 degree stretch. With lots of 22.5 degree sinks on each of the antler points, I ended up with the following model:

Antlered Snake, Ryan MacDonell

Antlered Snake, Ryan MacDonell

As I mentioned earlier, the idea behind this model is to fold any subject with antlers added. With any luck I'll come up with a couple more models with antlers in the next few months (although I'm headed back to university tomorrow). I'm also hoping to see other bizarre models with antlers as a sort of informal challenge, but I can only wait and see what other people fold.

Thursday, July 18, 2013

Aperture Science Handheld Portal Device

Ever since I folded my creeper last summer I've been meaning to try out a few more models based on creatures/objects from video games. Oddly, I have a surprising amount of knowledge about popular PC and console games despite the fact that I've played almost none of them. I've never owned a console of any type, and (other than a brief attempt at StarCraft: Brood War when I was younger) I haven't bought or downloaded any PC games either. Even though I haven't player it, I've been particularly interested in Portal since the release of Portal 2, so I thought it would be fun to fold a portal gun. My first few attempts at the portal gun were during this year's OUSA convention in New York. At first I was designing without any reference image, and as a result I missed a lot of important details and colour changes. After getting home and starting fresh with the right image in mind, I ended up with this crease pattern:


Note that I'm trying out a new style in the CP, with different line thickness for folds in the opposite direction. Unwrapping some paper in the front and back gives the white body and handle, while thinning the 3 corner flaps makes the grabby antenna things. Here is my result:

Ack!-ademia, Ryan MacDonell

Monday, May 13, 2013

Piled Higher and Deeper

The title may or may not be stolen from a comic that I read regularly, although it is related to my latest model. The model is an arm reaching out from pages of a book as though someone (i.e. me) has been sucked into the textbook, and I figure the title "Ack!-ademia" works well. When originally getting a coming up with the book on its own, I managed to "re-design" David Brill's simple little book. The final design uses the same pattern with a bit of extra box pleating on the side. Here is the CP:


The layers get a bit thick in the arm, so I added the diamond in the middle to distribute them a bit better. Moving the diamond left makes a thicker arm but thinner cover (seeing as the extra flap can be hidden under the cover). Unfortunately, I didn't design the model quickly enough so for now I have to post a copy-paper rendition of the model.

Ack!-ademia, Ryan MacDonell